Most teams add a chat widget to their website and stop thinking about it. They paste an embed script, see the widget appear in the corner, and assume the job is done.
Then a visitor asks a question, receives a generic response, and leaves the site without converting.
The widget isn't the problem. The configuration is.
The VoiceInfra AI Website Widget is designed to do much more than display a floating chat button. It can handle natural voice and chat conversations, collect visitor information before a conversation starts, route callback requests to your business phone number, and match your website's branding so naturally that visitors feel like they're speaking with a real member of your team.
The best part is that you can configure everything from a single dashboard without touching your website code after installation.
In this guide, we'll walk through each section inside the Widget Builder, explain what each setting does, when you should use it, and share best practices to help you deliver a better experience for your visitors.
Before You Start: What Can the VoiceInfra Widget Do?
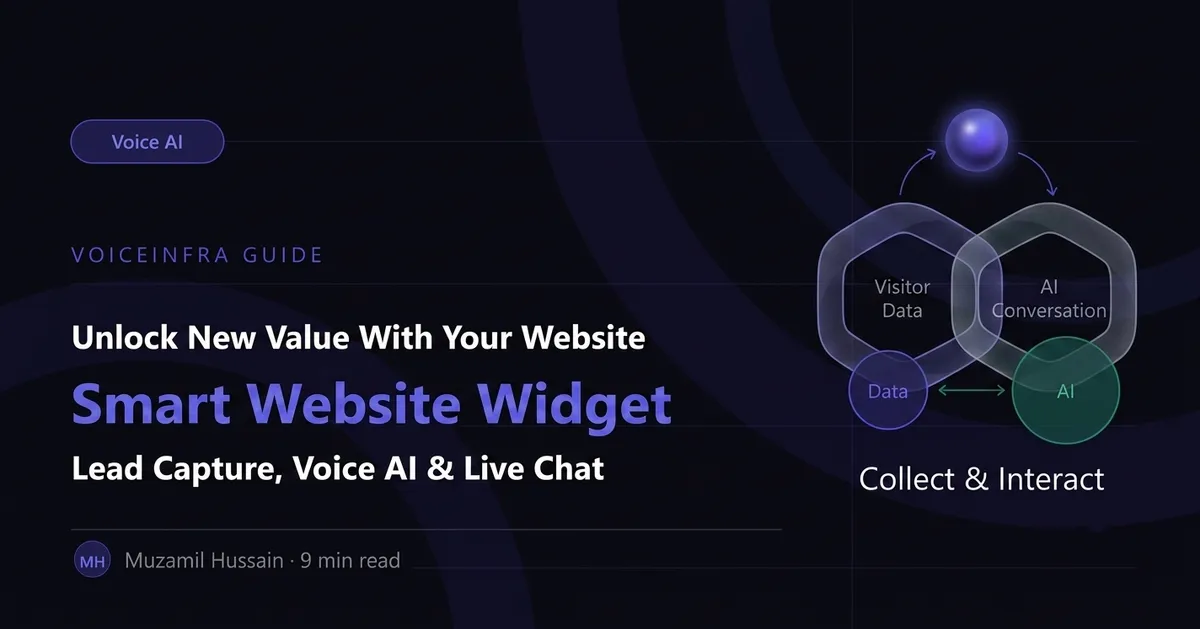
The VoiceInfra Website Widget combines voice AI, live chat, lead capture, and website branding into a single embeddable component.
Once installed, it can:
Hold natural voice conversations directly from your website.
Power live AI chat using your assigned assistant.
Collect visitor information before conversations begin.
Let visitors request a callback from your business.
Display a live transcript during voice conversations.
Match your company's colors, logo, and branding.
Update automatically whenever you make changes in the VoiceInfra dashboard.
Instead of managing multiple plugins and third-party tools, you configure everything from one place.
Let's walk through each section.
1. General
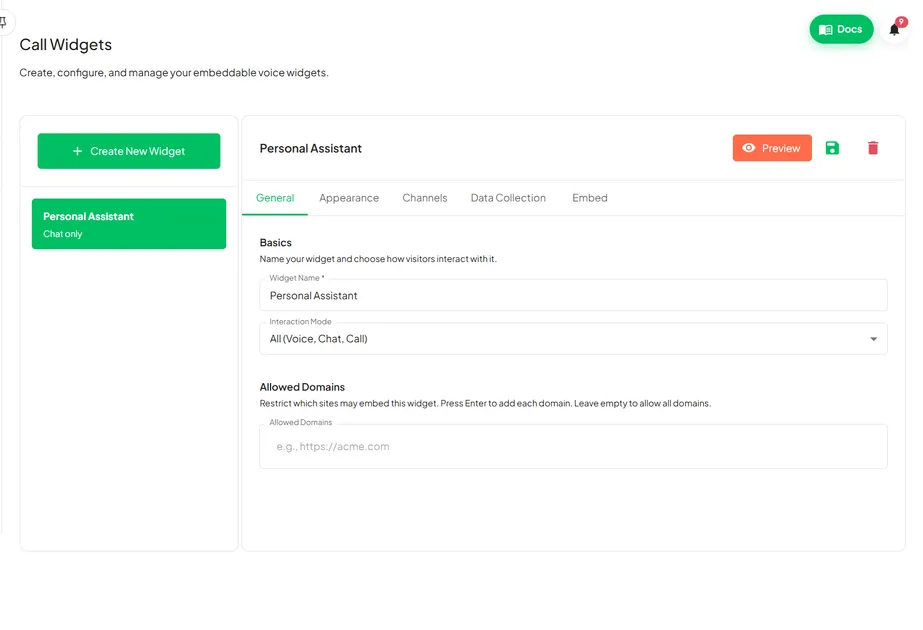
The General section is where your widget gets its identity.
Although this page only contains a few settings, they're some of the most important because they determine how your widget behaves before a visitor even starts interacting with it.
Widget Name
Widget Name is only visible inside your VoiceInfra dashboard.
If you're managing multiple websites or different widgets for landing pages, support pages, or product pages, giving each widget a descriptive name makes management much easier.
Instead of naming it "Widget 1," choose something meaningful like:
Homepage Assistant
Sales Widget
Support Widget
Demo Booking Widget
You'll thank yourself later.
Interaction Mode
Interaction Mode determines how visitors communicate with your AI assistant.
Depending on your configuration, visitors can interact through:
All ( Voice, Chat, Call )
Voice
Chat
Voice & Chat
Voice Only
Call Request Only
Chat Only
Chat & Call Request
Voice & Call Request
Choose the option that best fits your customer journey.
For example, a sales website may benefit from both voice and chat, while a support portal might only require chat.
Allowed Domains
This setting is one of the most overlooked security features.
By default, anyone with your widget code could potentially embed it on another website.
Allowed Domains prevents that.
Simply enter each approved domain and press Enter to add it.
For example:
If you leave this field empty, the widget can run on any website where the embed code is installed.
For production websites, restricting domains is always recommended.
2. Appearance
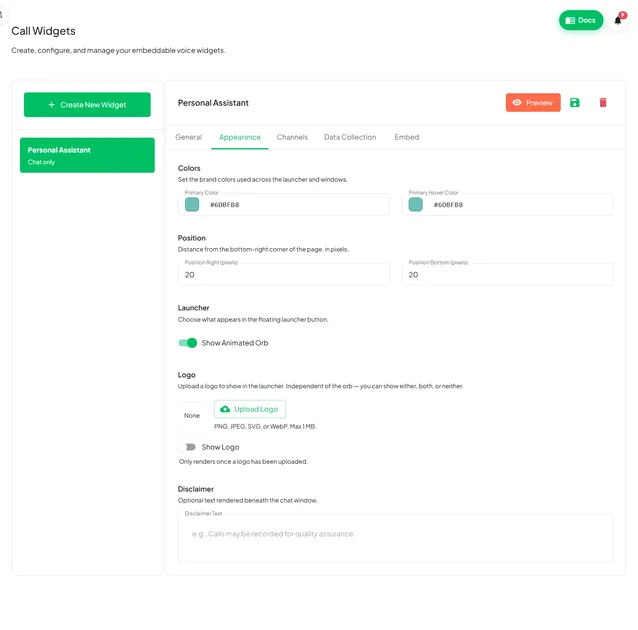
A widget should feel like part of your website, not something visitors immediately recognize as third-party software.
The Colors section allows you to fully customize your widget's appearance.
Primary Color
Your Primary Color controls the overall appearance of the widget, including buttons, highlights, icons, and important interface elements.
Choose a color that matches your existing brand palette for a seamless experience.
Primary Hover Color
This is the color visitors see when hovering over buttons and clickable elements.
A subtle hover effect makes the interface feel more responsive and polished.
Widget Position
You can control exactly where the launcher appears using:
Position Right
Position Bottom
These values are measured in pixels.
If your website already includes cookie banners, sticky contact buttons, or WhatsApp widgets, adjusting these values prevents overlapping elements.
Launcher Options
You can customize what appears inside the floating launcher.
Options include:
Animated Orb
Company Logo
Both Orb and Logo
Neither
The Animated Orb adds a modern AI feel, while uploading your company logo helps reinforce your brand identity.
Supported formats include:
PNG
JPEG
SVG
WebP
with a maximum file size of 1 MB.
Disclaimer Text
If your business requires compliance messaging or AI disclosure, you can display custom text beneath the chat window.
Many businesses use this area for privacy notices or short disclaimers informing visitors they're interacting with an AI assistant.
3. Voice & Chat
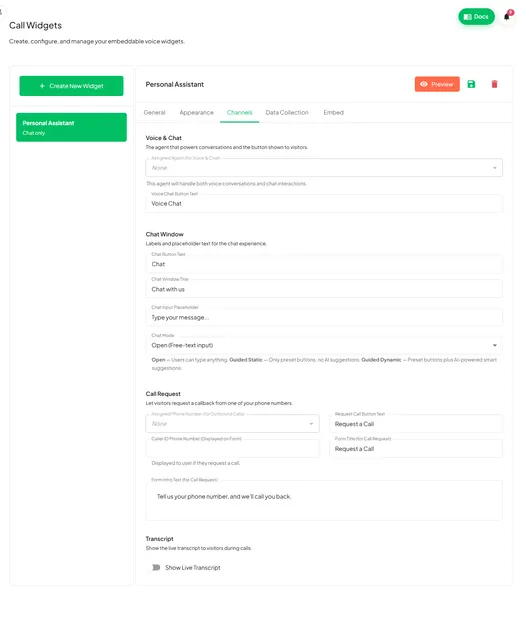
This is the heart of the widget.
Everything here controls how your AI assistant communicates with visitors.
Assigned Agent
The Assigned Agent is the AI assistant responsible for handling both voice conversations and chat interactions.
Before configuring anything else, make sure the correct agent is selected.
Without an assigned agent, your widget won't function correctly.
Voice Chat Button Text
Customize the text shown on the voice call button.
Examples include:
Talk to Sales
Start Voice Chat
Speak With AI
Call Assistant
Keep it short and action-oriented.
Chat Window Settings
You can personalize the chat experience by customizing:
Chat Button Text
Chat Window Title
Chat Input Placeholder
Small wording changes can make conversations feel significantly more welcoming.
Instead of:
"Customer Support"
Try:
"How can we help today?"
Simple changes often improve engagement.
Call Request
If visitors aren't ready for a live conversation, they can request a callback instead.
Configure:
Assigned Phone Number
Caller ID Phone Number
Request Call Button Text
Form Title
Introductory Text
This feature works particularly well for sales teams and appointment booking.
Live Transcript
Enable Show Live Transcript if you'd like visitors to follow the conversation in real time.
This improves accessibility and builds confidence because visitors can immediately see what the AI understands during voice conversations.
4. Form Data Collection
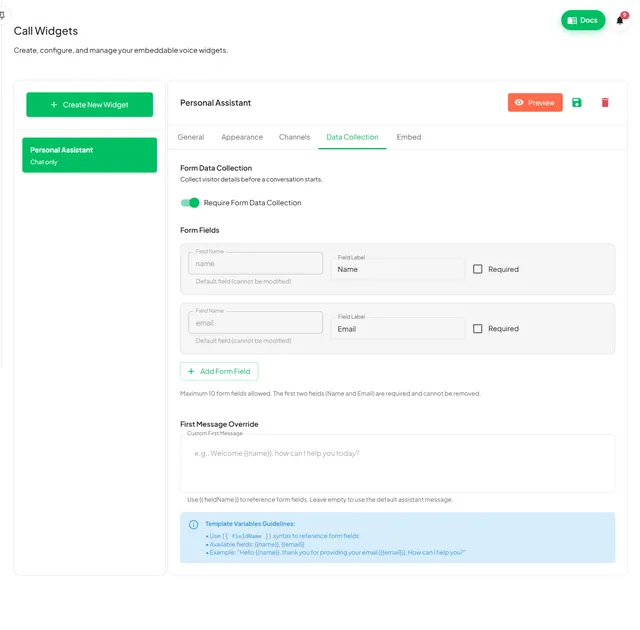
Sometimes it's more valuable to know who your visitors are before the conversation begins.
This section allows you to collect visitor information before chat or voice starts.
Require Form Data Collection
When enabled, visitors complete a short form before interacting with your AI assistant.
When disabled, conversations begin immediately.
Choose whichever experience matches your sales process.
Form Fields
Every widget automatically includes:
Name
Email
These fields cannot be removed.
Beyond those, you can create up to ten fields, including:
Company Name
Phone Number
Job Title
Industry
Custom Questions
Each field can have:
Custom Label
Required Toggle
Only ask for information you truly need.
Long forms usually reduce completion rates.
First Message Override
One of the most powerful personalization features is the Custom First Message.
Instead of displaying a generic greeting, you can reference visitor information using template variables.
Example:
Hello {{name}}, thanks for sharing your email ({{email}}). How can I help you today?
This creates a much more natural conversation because the AI already knows who it's speaking with.
If you leave this section empty, the widget uses the assistant's default greeting.
5. Website Integration
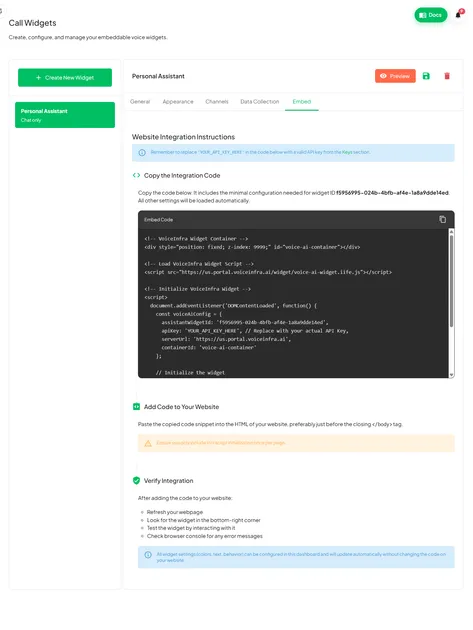
Once your widget is fully configured, it's time to publish it.
VoiceInfra automatically generates an embed script for your widget.
Installation only takes a few minutes.
Step 1
Copy the generated embed code.
Step 2
Replace:
YOUR_API_KEY_HERE
with your actual API key from the Keys section.
Step 3
Paste the script before your website's closing </body> tag.
Step 4
Refresh your website.
Step 5
Confirm the widget appears in the bottom-right corner.
Step 6
Test both chat and voice conversations.
Here is an example of how the widget can be added inside a complete HTML page:
<!DOCTYPE html>
<html lang="en">
<head>
  <meta charset="UTF-8" />
  <meta name="viewport" content="width=device-width, initial-scale=1.0" />
  <title>Your Website</title>
</head>
<body>
  <h1>Welcome to Our Website</h1>
  <p>This is where your page content goes.</p>

  <!-- VoiceInfra Widget -->
  <script>
    (function () {
      var script = document.createElement("script");
      script.src = "https://cdn.voiceinfra.com/widget.js";
      script.async = true;
      script.setAttribute("data-api-key", "YOUR_API_KEY_HERE");
      document.body.appendChild(script);
    })();
  </script>
</body>
</html>
One of the biggest advantages of the VoiceInfra Widget is that future updates don't require editing your website again.
Changing colors, text, branding, forms, or assigned agents from the dashboard automatically updates the widget everywhere it's installed.
Best Practices
To get the best results from your widget:
Use your official brand colors.
Upload your company logo.
Restrict widget usage using Allowed Domains.
Assign the correct AI agent before publishing.
Keep forms as short as possible.
Personalize greetings using template variables.
Test both desktop and mobile experiences.
Verify your callback phone number before going live.
Quick Setup Checklist
If this is your first widget, configure everything in this order:
Basics
Voice & Chat
Form Data Collection
Colors
Website Integration
Following this sequence makes setup much smoother and helps avoid configuration mistakes.
Final Thoughts
Adding an AI widget to your website takes only a few minutes. Configuring it properly is what creates a great customer experience.
With the VoiceInfra AI Website Widget, you can combine voice conversations, AI chat, lead capture, callback requests, and personalized interactions into a single experience that feels like a natural extension of your brand.
Whether you're supporting customers, qualifying leads, booking appointments, or answering product questions, every setting inside the Widget Builder helps create faster, smarter, and more engaging conversations.
Take a few extra minutes to configure each section carefully, and your visitors will notice the difference from the very first interaction.
Ready to Experience AI-Powered Voice Automation?
Take the next step with VoiceInfra and see how AI voice agents can transform your business communications. Create your free VoiceInfra account today and start building intelligent voice solutions in minutes. Sign Up For Free Now
Related reading:
Smart Website Widget: Capture Leads, Not Anonymous Chats
Voice AI Agent vs Chatbot: Which One Does Your Business Actually Need?